Home Assistant + Reolink Video Doorbell PoE: Cloudless Doorbell Automations
Building on our and its , we're now ready to take things up a notch

Building on our initial exploration of Home Assistant and its automation capabilities, we're now ready to take things up a notch! In this follow-up, we'll delve into a more sophisticated automation setup which will show you how to display a camera feed in a mobile notification if someone is detected at your front door. If you're eager to enhance your smart home skills, let's jump into this more advanced tutorial.
The Security Implications of Cloud-Connected Cameras
The most obvious consumer competitor to the core idea of this post is the Ring system from Amazon. On the face of it, it seems like a good option. After all, it’s professional monitoring from a reputable company for only $20 per month. You also don’t have to wait for an installer to come out, you can fit all of the devices yourself.
The problem with this setup becomes more noticeable when you realise that the only way the service can be offered to you for such a ‘low’ price is that all of the footage is streamed up to Amazon’s cloud, where it’s analysed and retained. If you’re not already aware that the cloud is just someone else’s computer then that probably sounds nice and secure, because Amazon would never skimp on security to improve profit margins, right? The below stories unfortunately disagree quite vehemently:
Now if you’d rather some random Amazon contractor wasn’t able to access the camera feeds of your house - which likely includes your children, friends, and neighbours - read on for the solution!
But Why Even Bother…?
We covered the purpose of automations in a previous post, but the usefulness of this one should be self-evident, especially if you’re coming from the world of Ring. If someone is at your door, you’d like to be able to see them! Bonus points for being able to talk to them or unlock your front door, but we’ll probably cover these in a future post because they’re a touch more complex.
Let’s Get Started Then!
Prerequisites
A Home Assistant installation (container, HA OS, Supervised)
All of your sensors and services added as integrations (specifically the Reolink integration)
The Home Assistant app installed and logged in to your installation
Before embarking on any amount of change, it’s important to take a config backup, providing a restoration point in the event of a problem:
- Settings > System > Backups > Create Backup
Make sure you download that backup once created
Firstly, plug in your doorbell. For the Reolink Video Doorbell we’re using, that can either be using the terminals on the doorbell itself if you have standard wiring already in place, or via PoE (which we’d recommend based on the reasons listed here. Once it’s on the network, navigate to your Home Assistant setup then head to Settings > Devices & Services. You should see the Reolink integration waiting for you to configure it.
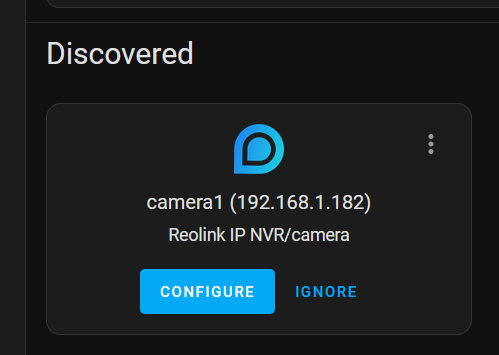
Before you press that inviting blue button though, we need to set a password for the camera because the integration won’t accept not having one (+1 for security!). Note the IP address on the pending integration (in my case, it’s 192.168.1.182), open another tab and type it in. Hitting enter should then bring you to the camera’s homepage, where the default username is admin and you can leave the password field blank.
Click the settings wheel in the top right corner
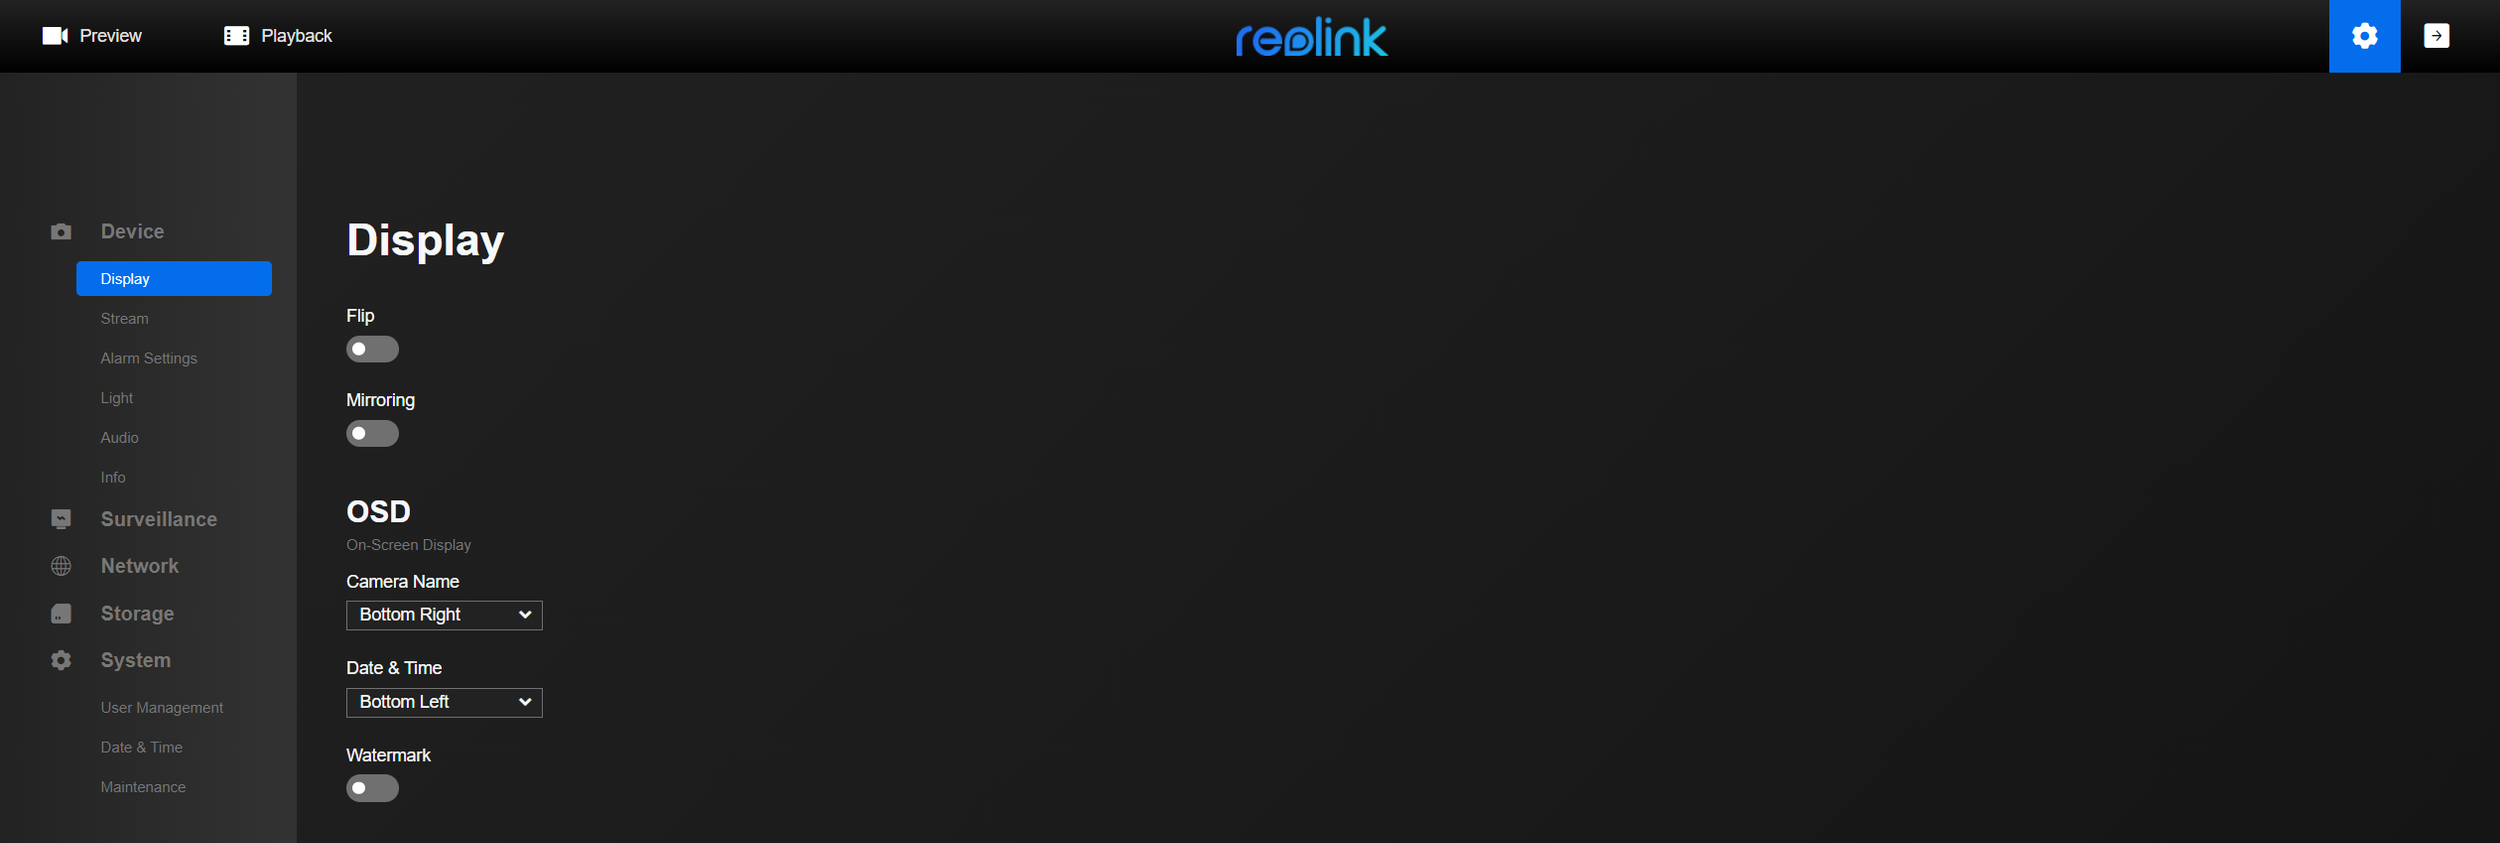
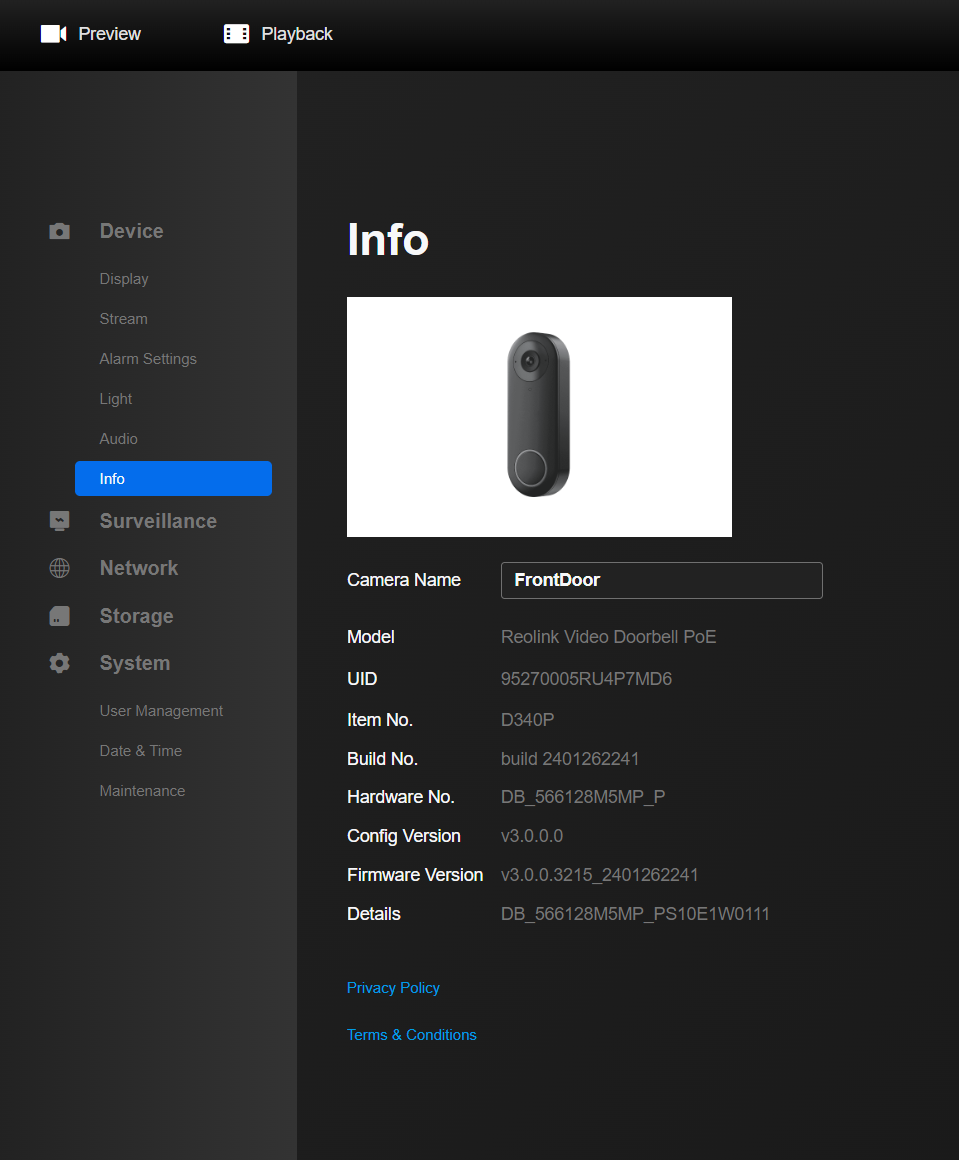
Whilst you’re here, visit the ‘Info’ tab on the left and give your camera the appropriate name. This will make it easier to find in Home Assistant later on.
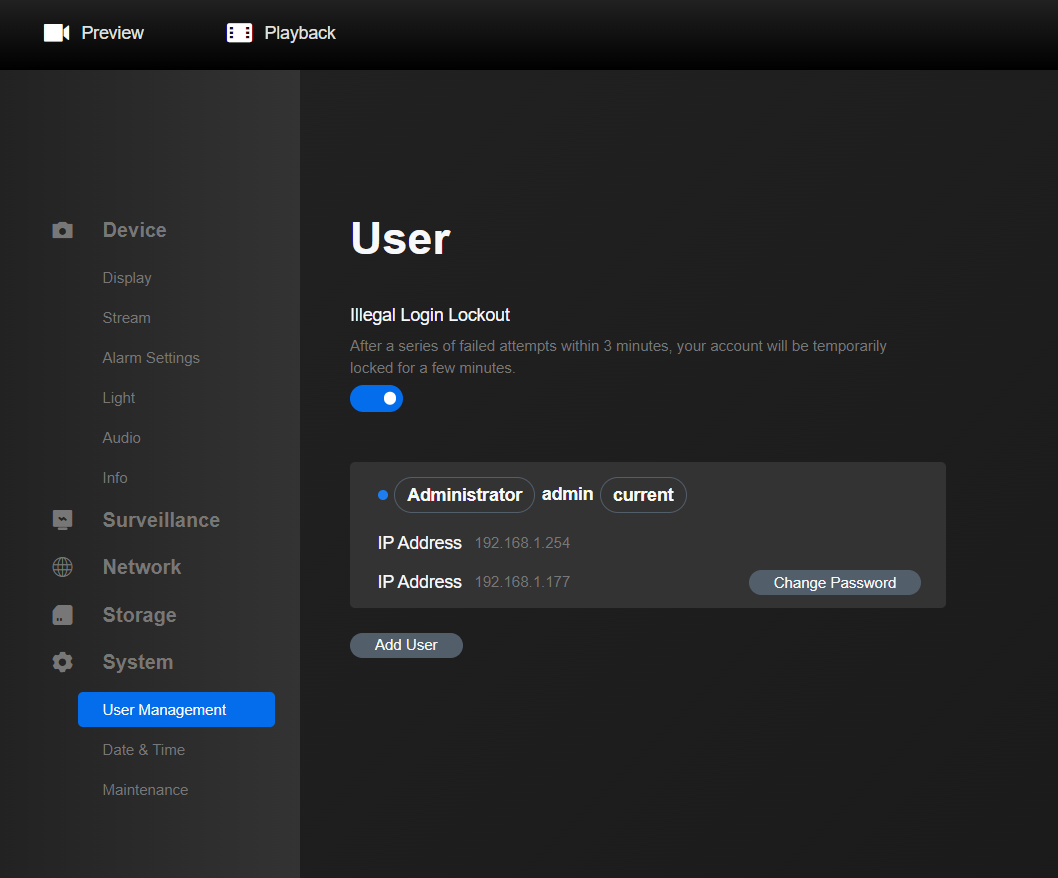
Now, head to System > User Management and click the ‘Change Password’ button. Bear in mind that you’ll have to give this password to the Home Assistant Reolink integration so don’t use that password you normally reuse for everything. Ideally use a Password Manager to generate that for you and store it for later use, you’ll only need to enter it once more and then never again. Bonus points if you make a separate user entirely for Home Assistant to use, this is how we’d do it but as this is all locally controlled it’s not a huge sticking point.
Return to the Home Assistant and you should now see that the integration has updated the camera name to whatever you changed it to in the camera settings. Refresh the page if you don’t see that. Click the ‘Configure’ button, give the user and password credentials you just set up and click ‘Save.’ You’ll now see the Reolink integration amongst your others, with 1 Device adopted.
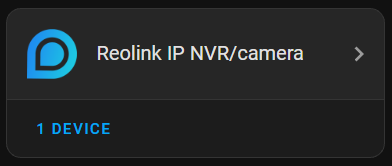
Click on the 1 Device below and you’ll be brought to the page with all of the sensors and properties of the camera. Take a minute to browse through these and see what cool possibilities you can think of for automations!
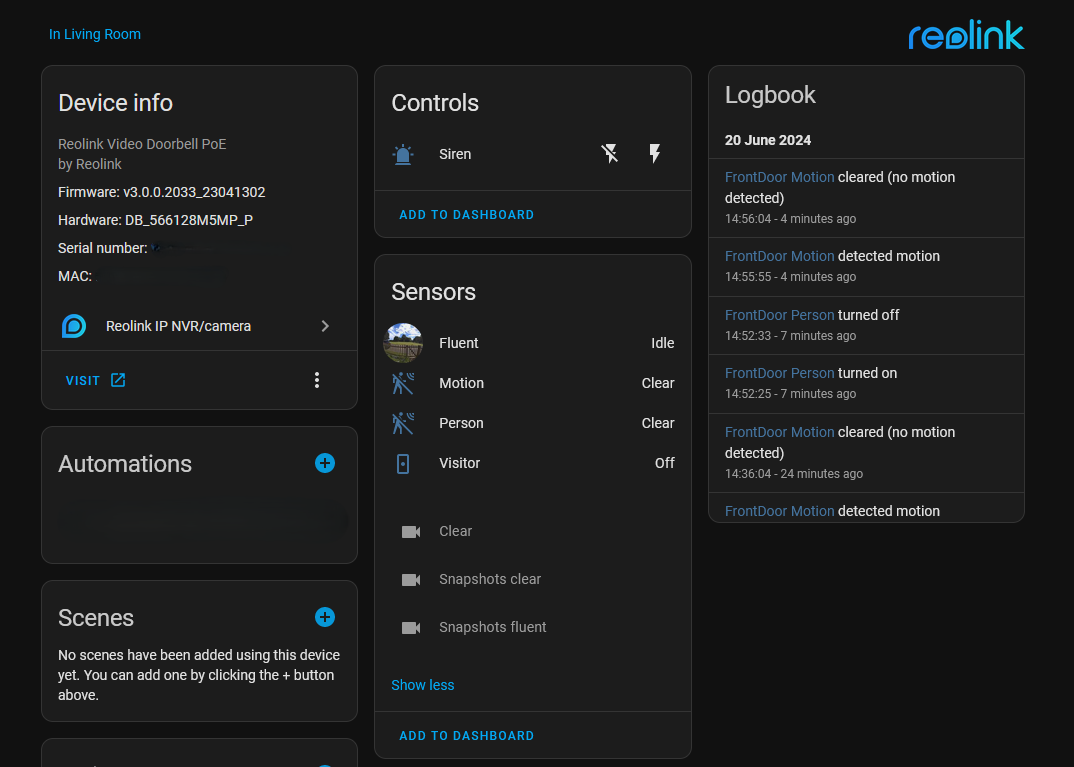
Once that’s done, click the blue ‘+’ icon next to Automations on the left.
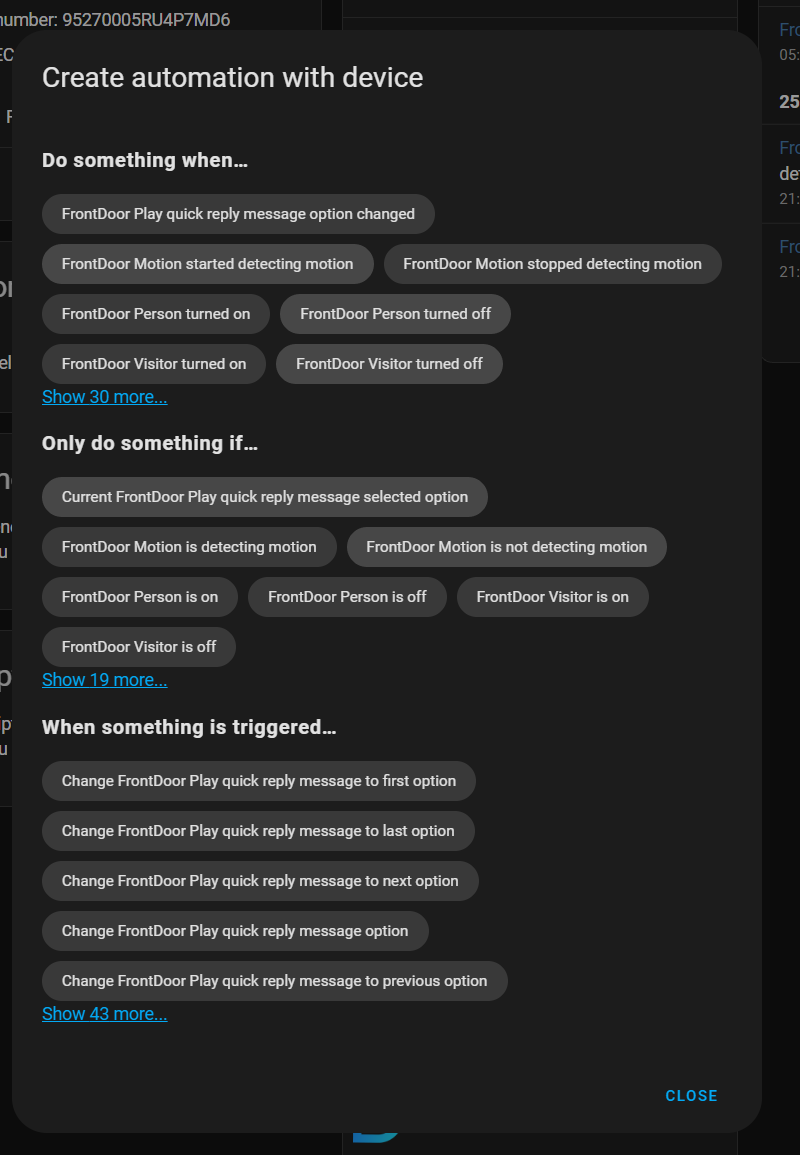
There’s a couple of options here depending on exactly what you want to do. You can make an automation for:
Whenever motion is detected
Will go off when cars, horses, or random tumbleweed cross your front door so could be quite spammy
Whenever a person is detected
This eliminates the above triggering an alert, and will do on-device AI detection to figure out if the object is a person before alerting you
However, I’ve noticed in my testing that it tends to be a bit too good at that and it will alert me on every cyclist going past the house… I know technically cyclists are people, but I’m yet to be convinced that they deserve the same rights as the rest of us (that’s a joke, cyclists are people too!)
Whenever a person actually presses the doorbell
This eliminates the motion detection/person recognition false positives because horses don’t press doorbells, so you can be pretty sure this will only trigger if something at the front door requires your attention
This is the one we’ll create in the rest of this post, but feel free to experiment with the others suggested here and reach out if you’d like some help!
We’ll go with the last option here, because it creates the least spammy notifications for us to test. The Reolink integration calls someone pressing the physical doorbell button ‘Visitor mode’ so we want to find the option in the ‘Do something when’ section called ‘CameraName Visitor turned on.’ Clicking this will take us to the New Automation page with the right ‘When’ condition already filled in.
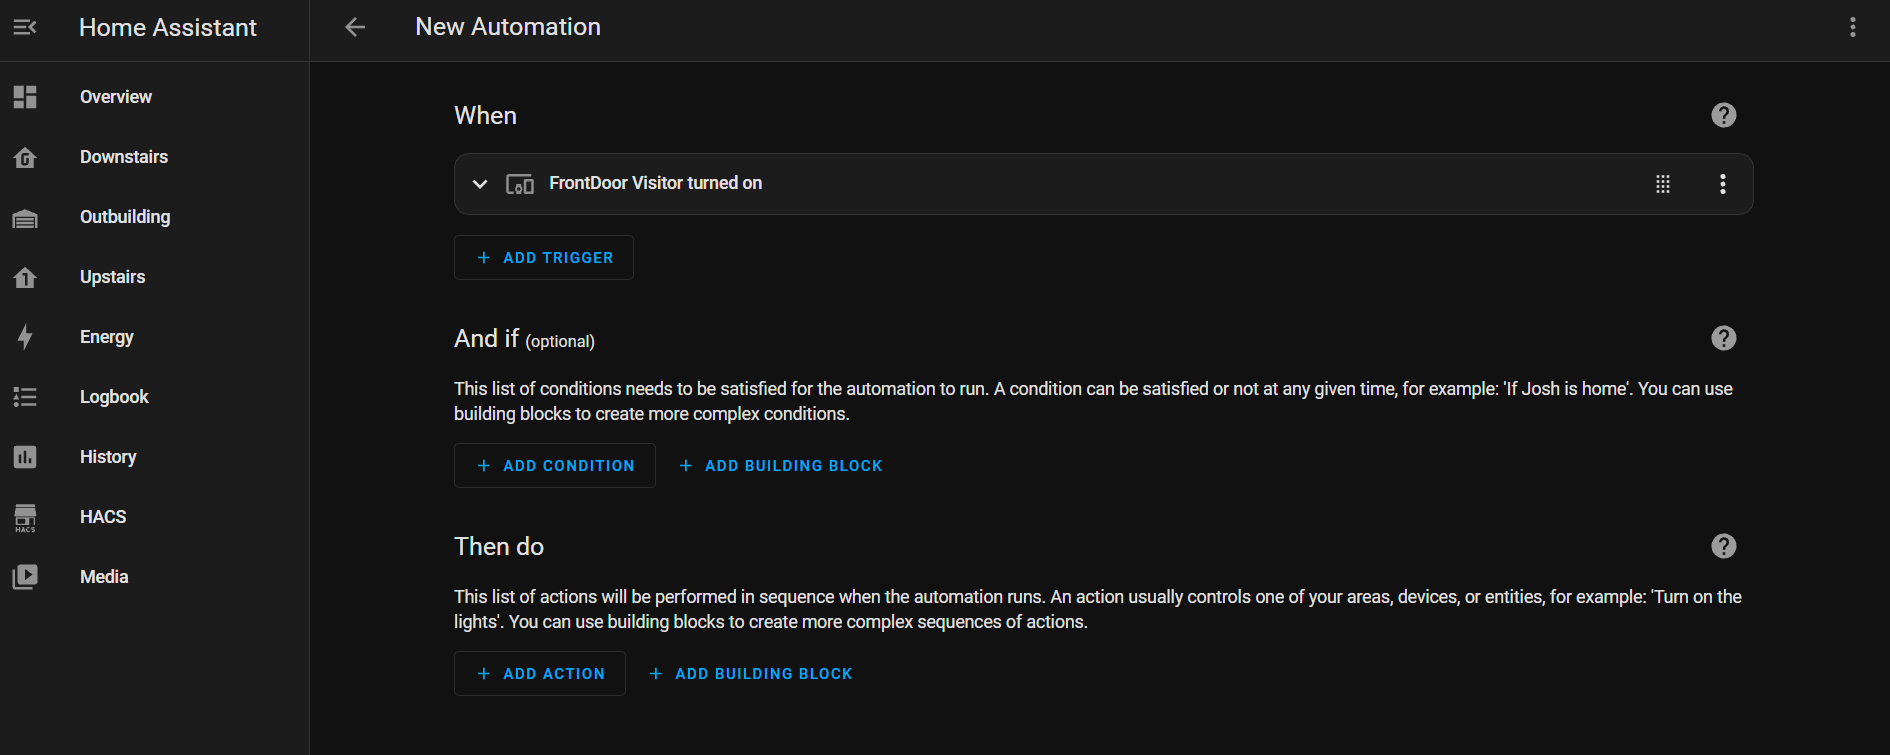
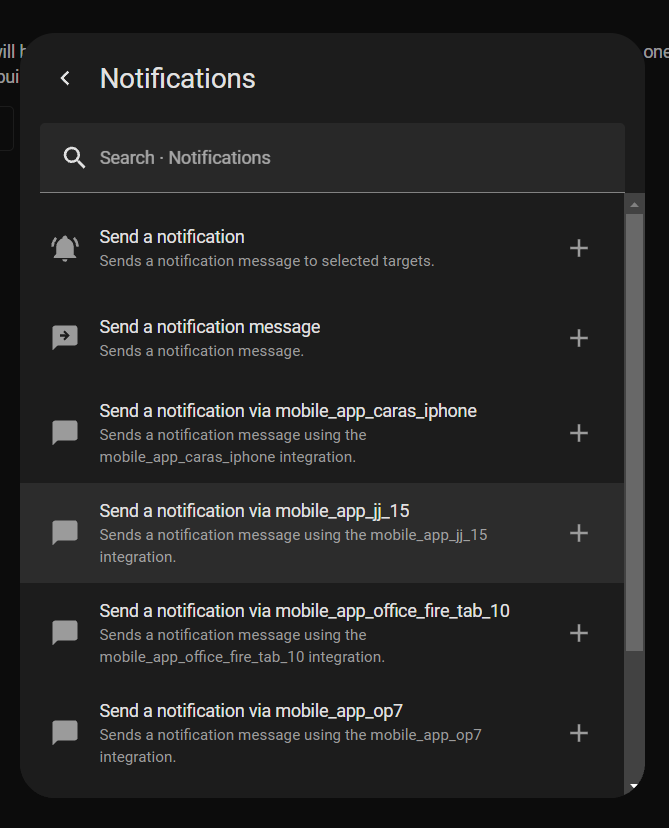
Under the ‘Then do’ section, click ‘+ ADD ACTION.’ Scroll down to select the ‘Notifications’ category, then find the entry which ends in ‘mobile_app_your_phone_name’ and click on it. For example, my phone is named JJ15, so my entry is highlighted below.
Set whatever Title and Message content you’d like, these will give the camera feed some context.
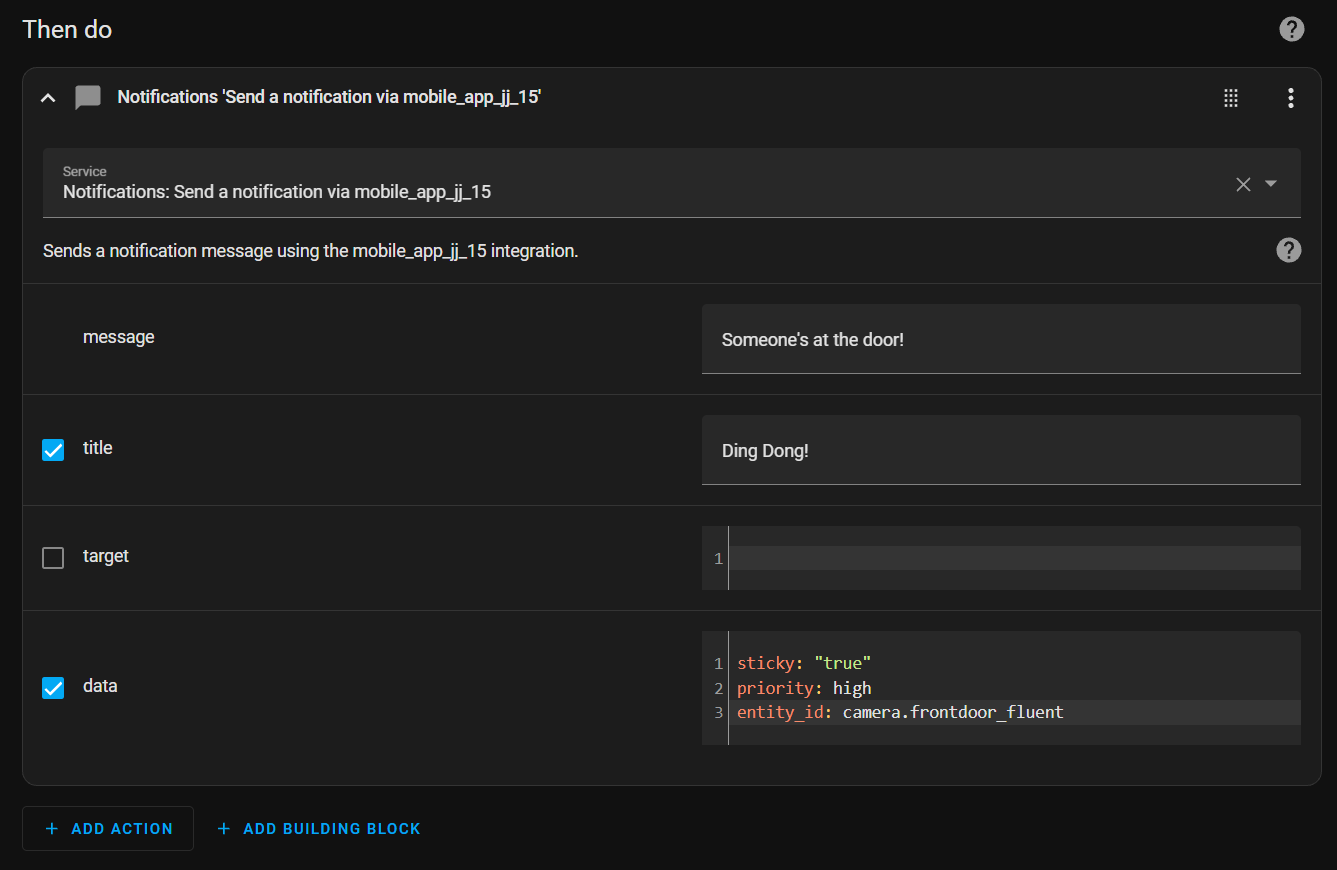
Here I’m using ‘sticky: true’ and ’priority: high’ because I don’t want the notification to be buried in amongst my others, if someone’s at the door I’d like to do something with that information. You can choose to omit these lines if you like, they’re not critical. The key bit is the ‘entity_id: camera.frontdoor_fluent’ bit. If you’re doing this in the Home Assistant UI, start typing it out by hand and once you’ve typed ‘camera.’ then the UI will pop up with a list of cameras for you to choose from, making your job a little easier. The ‘_fluent’ decorator is just how the Reolink integration displays the lower quality feed from the doorbell, and this is the one you want because bringing in the full 2K feed doesn’t really have any benefit in the tiny notification window.
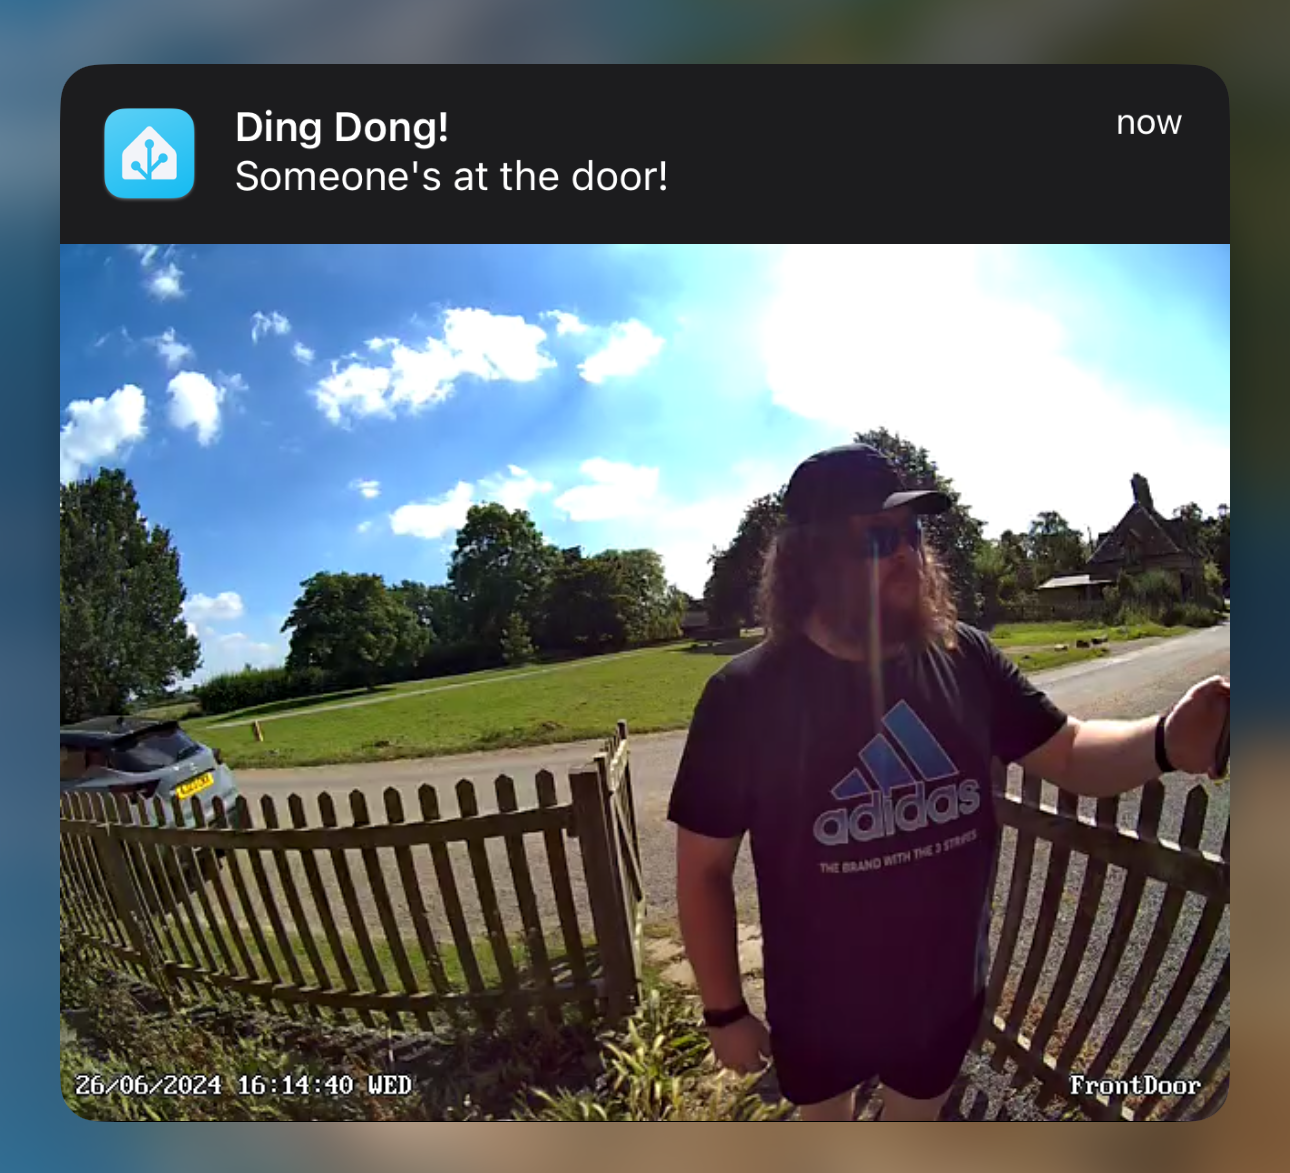
Here’s what our notification looks like on the iPhone!
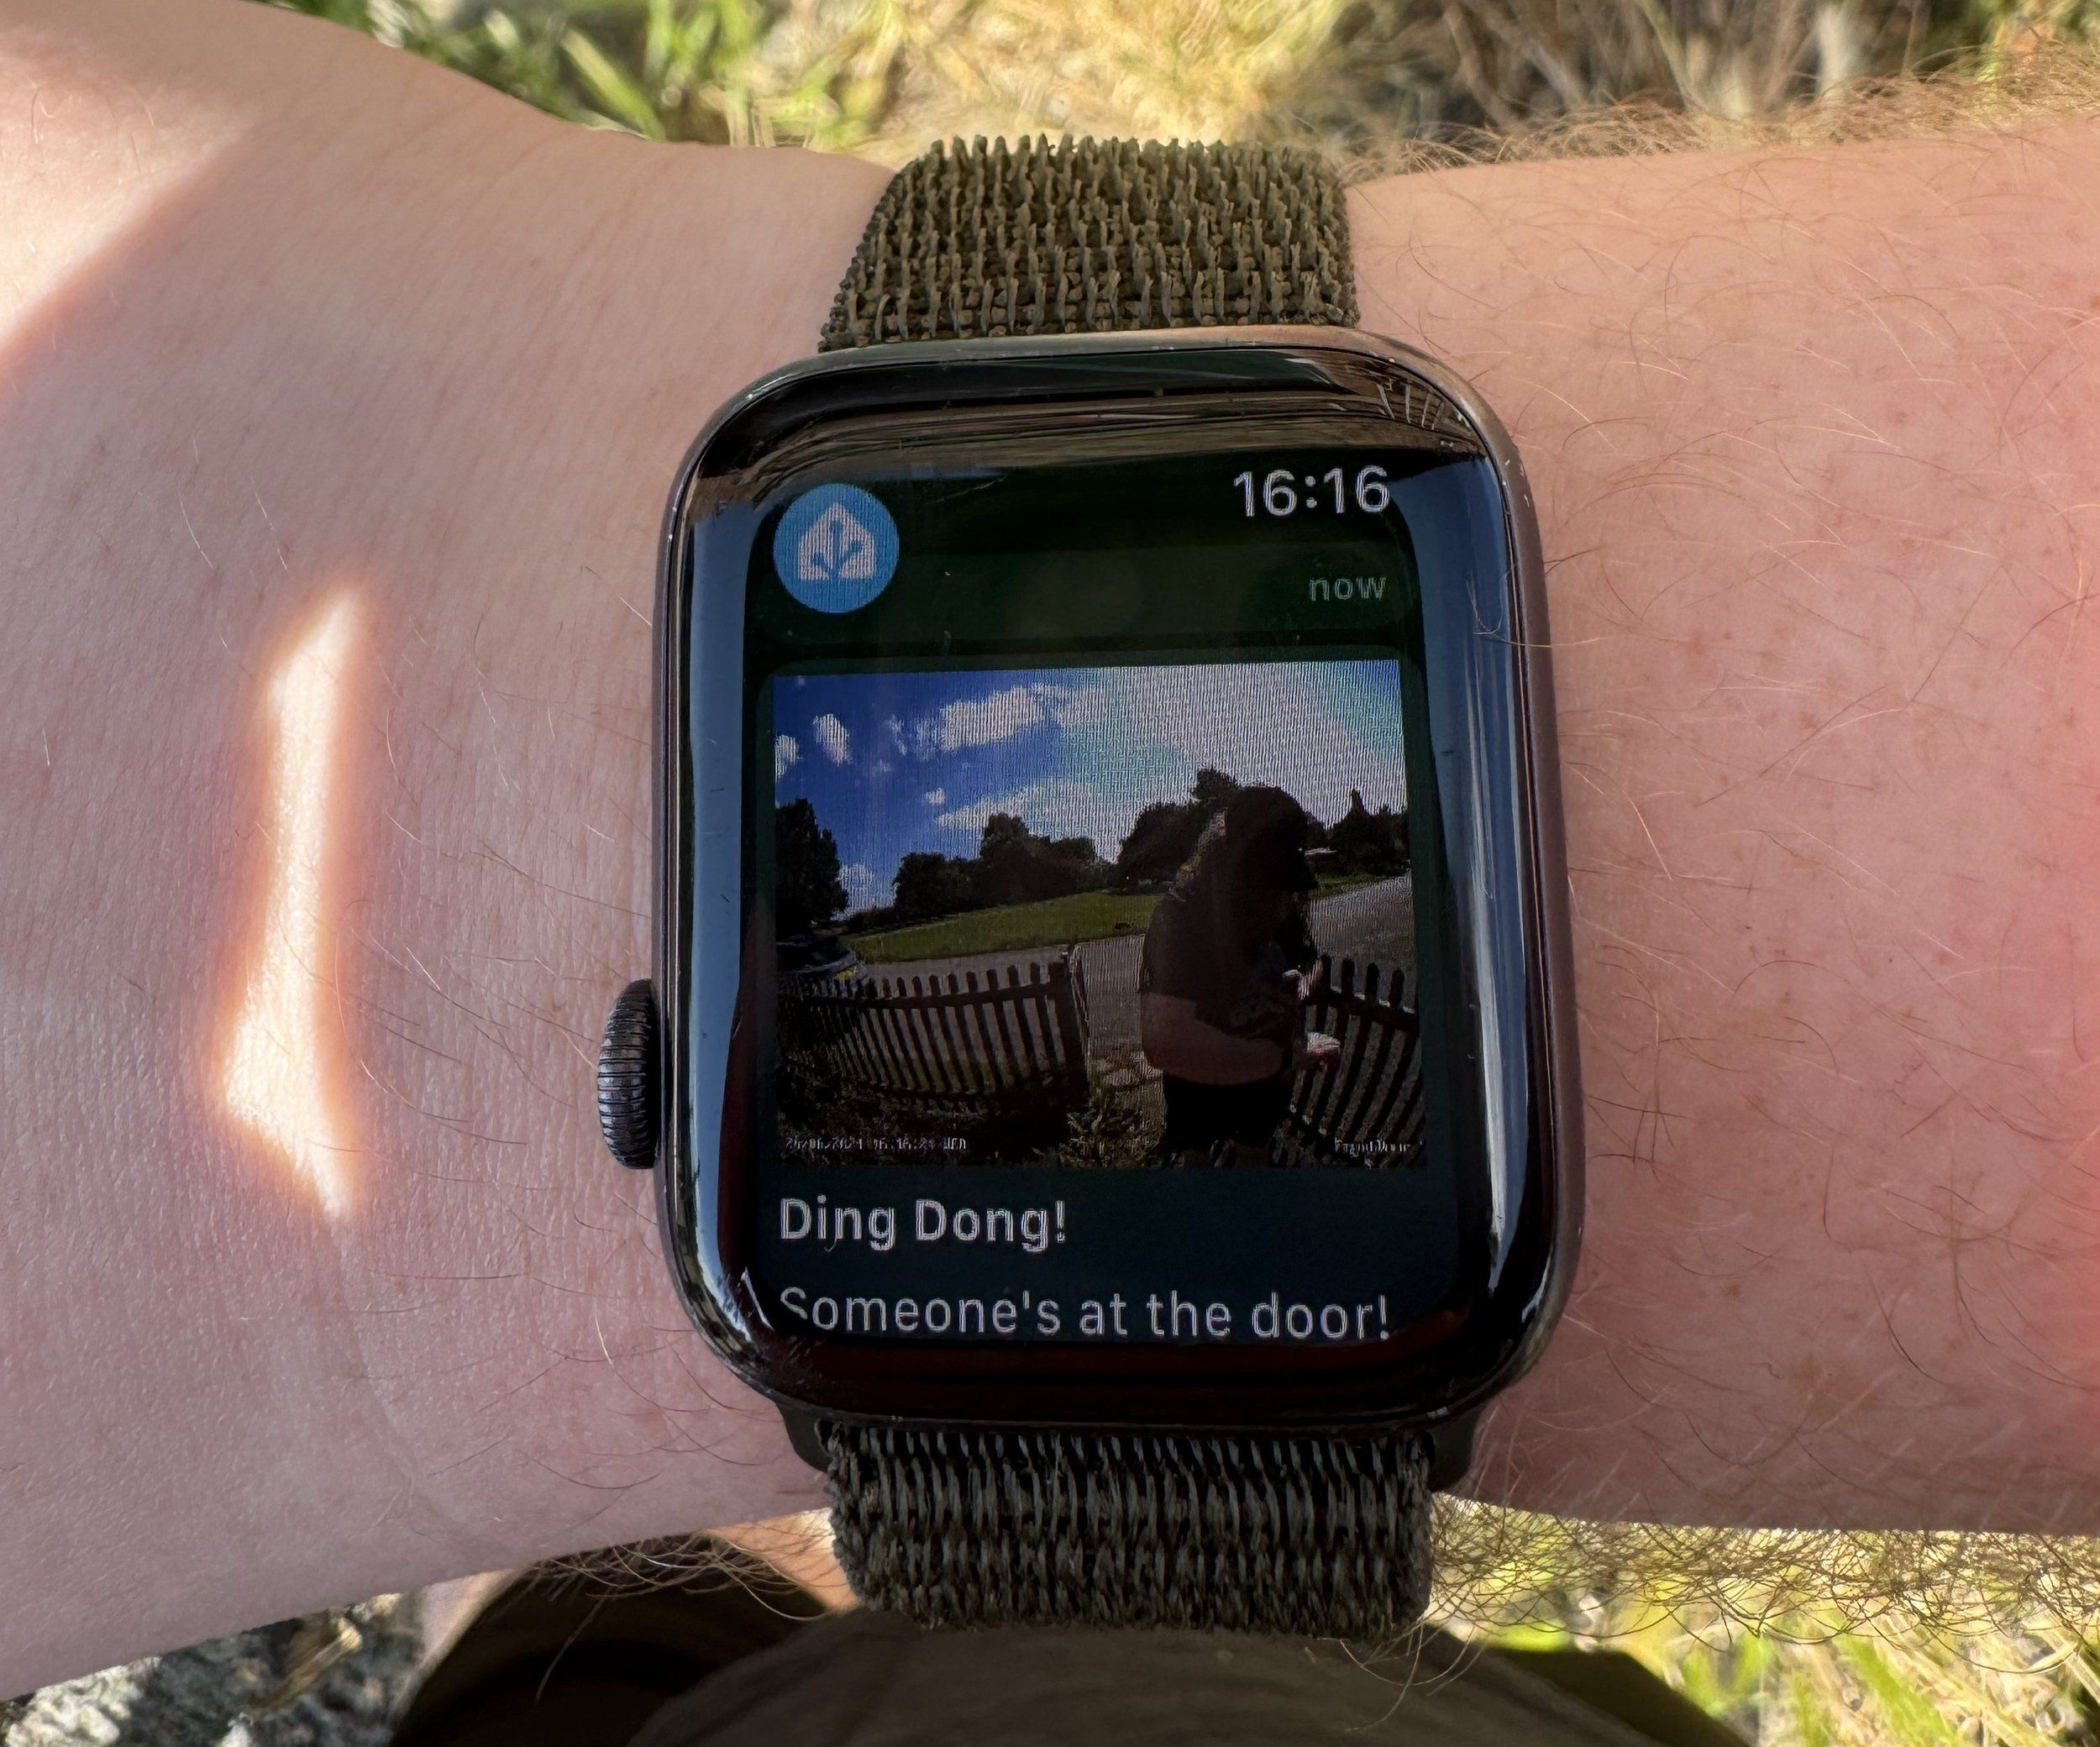
As a bonus, you also get the live feed on the dynamic notification to the Apple Watch as well, here’s what that looks like.
Here’s our whole automation in YAML format:
alias: Doorbell Notification
description: "Send a mobile app notification when the doorbell is pressed"
trigger:
  - type: turned_on
    platform: device
    device_id: your_device_id_here
    entity_id: your_device_id_here
    domain: binary_sensor
condition: []
action:
  - service: notify.mobile_app_jj_15
    metadata: {}
    data:
      title: Ding Dong!
      message: “Someone's at the door!”
      data:
        sticky: "true"
        priority: high
        entity_id: camera.frontdoor_fluent
mode: single
Additions to This Automation
There’s always more to do, so to save this post being too lengthy here’s a few addons you might want to explore yourself:
Sending the notification to multiple members of your household
Adding an ‘And if’ clause to only show you the notification if you’re home
Bonus: Using the ‘snapshot’ service in Home Assistant to only send you an image if you’re away from home
This will save on bandwidth and make things a lot quicker to load whilst you’re at Sainsbury’s!
If they’re proving difficult but you still want to make use of something like that, get in touch!
