Home Assistant Automations 101 - Build Your First Automation
In a previous post () we introduced Home Assistant as the possible savior of the home automation sector, we even teased some interesting automations

In a previous post (see here) we introduced Home Assistant as the possible savior of the home automation sector, we even teased some interesting automations. In this post we will share a 101 run through of how to build automations. Let’s get started!
Prerequisites:
Here are some assumptions and things you will need before you get started:
A home assistant installation (container, HA OS, Supervised)
All of your sensors and services added as integrations
The correct system time and timezone configured (Settings > System > General)
Before embarking on any amount of change, it’s important to take a config backup, providing a restoration point in the event of a problem:
Settings > System > Backups >Create Backup, Download that backup once created.
Why Use Automations?
We need to establish the reason and background for using automations, this will ensure that we are solving problems, not creating further complications. A great place to start is by taking an event which happens on a schedule or is triggered by a defined set of conditions and requires a subsequent action. Here are some examples:
The average room temperature drops below 18 degrees and people are at home - turn on the central heating, but not in the study room because it’s the weekend.
It’s 7pm and the recycling collection is due tomorrow morning - send a reminder to only the devices of people who are currently at home.
Someone rings the doorbell - cast the doorbell video feed to the TV to all dashboard control panels (subscribe for future articles on this).
As you can see we are taking an input, checking conditions, then carrying out actions based on any further conditions or filters (such as rooms or labels).
Home Assistant’s automation scripting abilities are extremely powerful. The only real limit of its capabilities are bound by the capabilities of your smart home devices and your imagination.
If you’d like to learn more about Home Assistant and how DataSolace use it to build smart homes and properties, reach out.
Create Your First Automation
Now that we have covered the theory, let’s get started. The example I am going to show you will create an alert on my Apple watch when my 3D printer finishes a print, then turn off the extractor fan in my printing cupboard after a further 15 minutes.
There are 2 main ways to begin creating your automation:
Settings > Automations and Scenes > Create Automation.
Settings > Devices and services > [your target device] > Create automation with device.
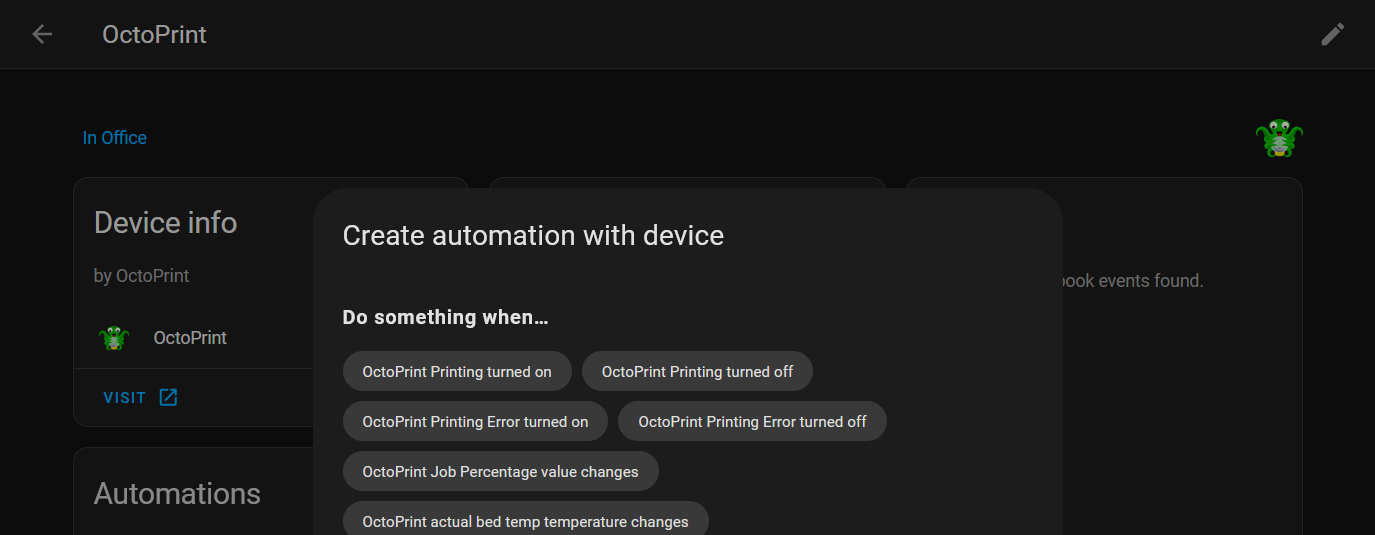
We will be using option 2, this gives us a swell of starting points for our automation, based on that device’s registered controls and sensors. As you can see below, my 3D printer (linked via OctoPrint) publishes it’s print state and job percentage to Home Assistant; creating a device automation gives us a head start with these values:

When - Automation Trigger
Select a starting point for your automation.
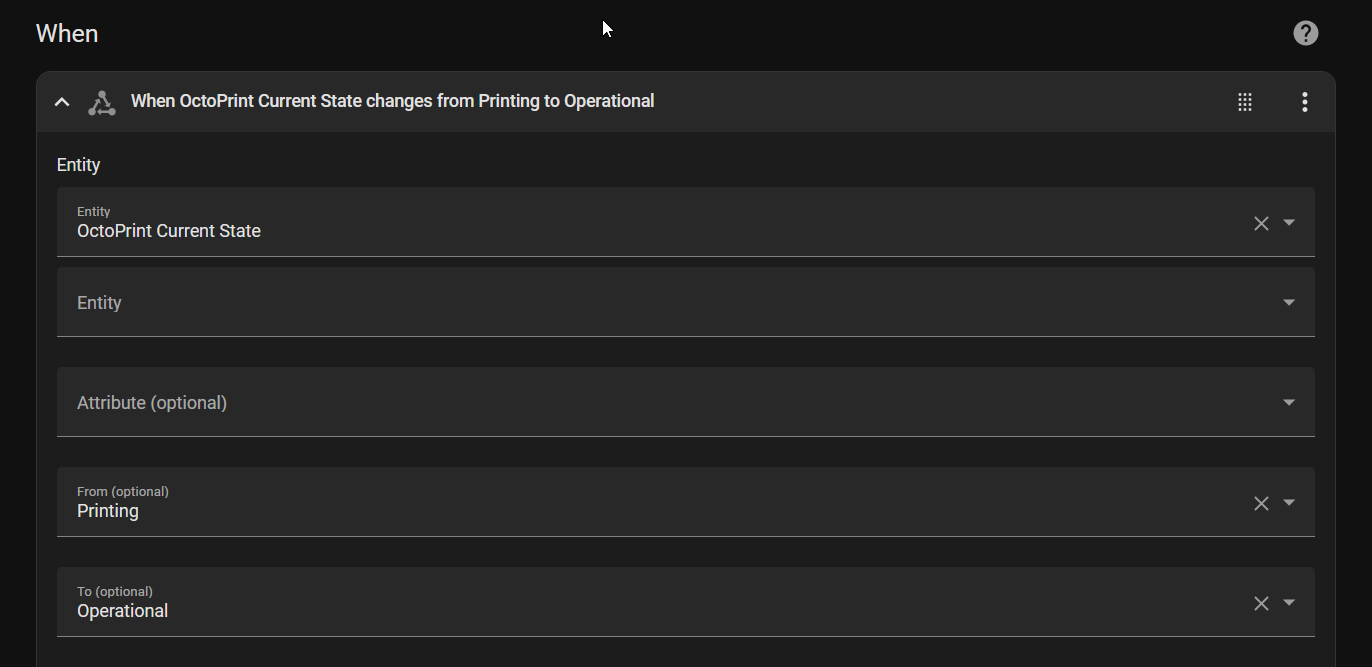
I opted for a state change in `OctoPrint Current State`.

Define the from and to values for the state change trigger.
My 3D printer state changes from Printing to Operational when the print is complete. You can also define how long (seconds, minutes, hours) this new state must be active for before it registers as true - this is great for overcoming flapping values and false positives.

If you need to monitor two entity states, for example a second 3D printer sharing the same automation, you can add another trigger. If you start to do this, be mindful of actions taken based on only one of multiple triggers.
And if (optional) - Automation Conditions
Add any conditions required for the automation to continue.
In this example, I only want the actions started by my automation to take place if I am home, so I create a condition Time and Location > Zone. I set my user (which is linked to my watch and phone for tracking) as the entity and Home as the location. Home is a geofence location; you can set these up in Settings > Areas, Labels & Zones.

If you are running an up to date version of Home Assistant, you can test these conditions for pass or fail from inside the automation builder:

Then Do - Automation Actions
Finally, we have reached the stage where we define what happens as a result of our triggers and conditions. In our example we want to carry out two actions, but we want to complete the second (turning off the extractor fan) after a 15 minute delay.
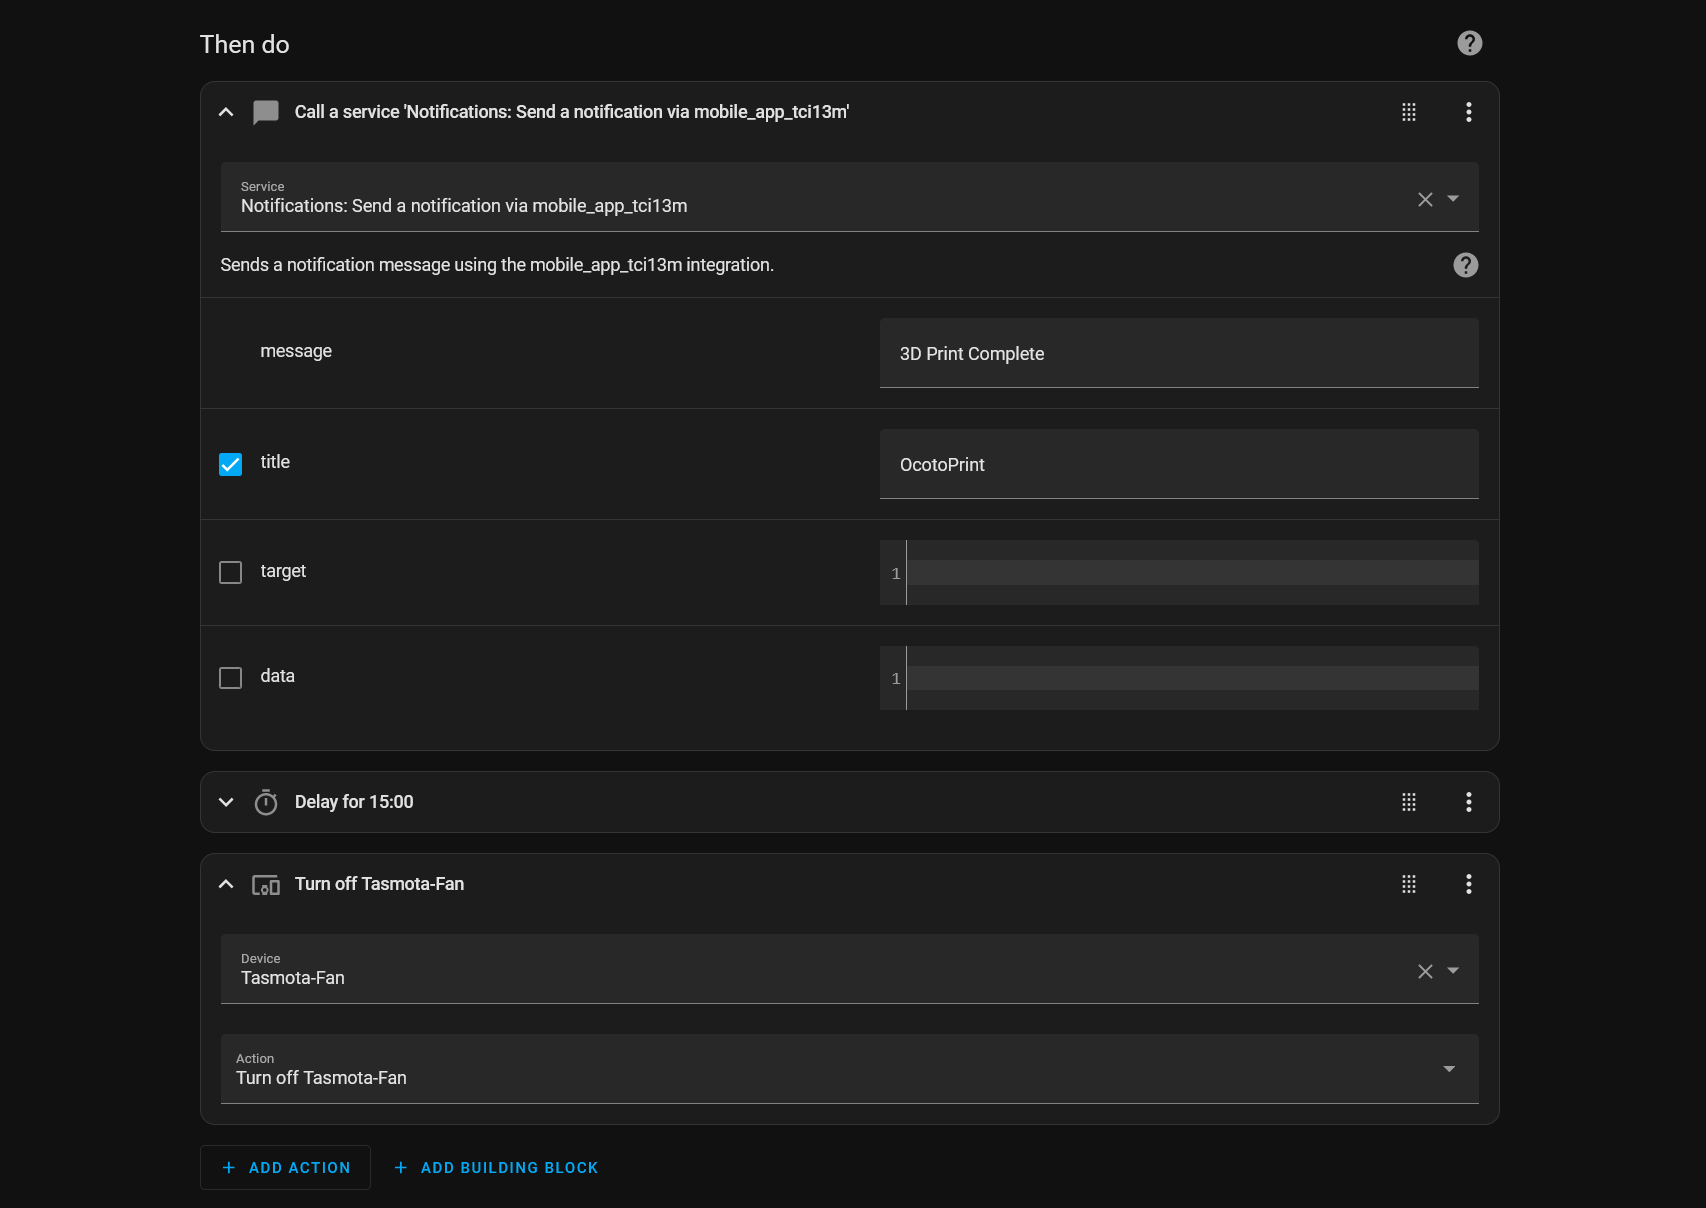
Add a notification action.
Creating a notification action using Add Action > Notification > Send a notification via [device name]. It’s also possible to send a notification to a group of named devices.
Define the message content and the title of the notification.
Add a 15 minute delay using a building block.
Actions are carried out in order in which they are defined, so after the Apple watch alert, we want to start the 15 minute timer before our extractor fan turns off. Do this with Add Building Block > Wait for time to pass (delay) > set the value to 15 minutes.
Add our final action, turn off the extractor fan.
Once the 15 minute delay has elapsed, we want our extractor fan to turn off - this fan in plugged into a mains socket using a mylocalbytes Tasmota plug. To change its power state to off, Add Action > Device > find device by name > set Action to Turn off [device name]:

Here is what our complete automation looks like in YAML format:
alias: Notify - OcotoPrint Complete
description: ""
trigger:
  - platform: state
    entity_id:
      - sensor.octoprint_current_state
    from: Printing
    to: Operational
condition:
  - condition: zone
    entity_id: person.tom
    zone: zone.home
action:
  - service: notify.mobile_app_tci13m
    data:
      message: 3D Print Complete
      title: OcotoPrint
  - delay:
      hours: 0
      minutes: 15
      seconds: 0
      milliseconds: 0
  - type: turn_off
    device_id: b6e12e0ce3c9985e6f00c72756b40aed
    entity_id: 64b67cf94fb67dc6297eec11699dde8b
    domain: switch
mode: single
Debugging
From within the automation editor you can manually run the automation from the menu icon (top right) and you can also view the trace history. Traces visualises the stages of your automation and collates the log history.
If you’d like to stay up to date with more content like this, consider joining our subscriber list with the form below to get notified whenever we post.
Subscribe for Updates
Sign up with your email address to receive Datasolace news and updates.
Email Address
Sign Up
We respect your privacy.
Thank you!
